You’ve decided to buy some bitcoin. You’ve also read enough stories about people losing theirs to want to do this properly rather than quickly.
Both things are achievable, and the trick is not attempting them in the same afternoon. Buying bitcoin and storing it safely with a cold wallet are two separate jobs buy first, get comfortable, then set up storage carefully and move it across when you’re not in a hurry.
How to Buy Bitcoin and Store It Safely
The short version
Buy on a reputable platform that takes NZD. Set up a hardware wallet separately and verify it works before any funds are involved. Then move your holding across, starting with a small test transaction.
Rushing the two halves together is how people make the one mistake that can’t be undone.
Part one buying bitcoin in New Zealand
Choosing a platform
New Zealand has genuinely local options, which matters more than most guides acknowledge. What to compare:
- NZD deposits — direct bank transfer beats converting currency
- Where it’s incorporated — an NZ-registered business versus an offshore platform, which determines whose law applies if things go wrong
- Verification requirements — every legitimate platform requires ID
- Fees — spread, trading fee, and withdrawal fee
- Withdrawal support — can you actually get your bitcoin out to your own wallet, easily?
That last point catches people. Some platforms make buying effortless and withdrawing awkward. If the plan is to move it to your own wallet, check that path exists before you deposit anything.
The ID check is normal
You’ll need to verify your identity usually a driver licence or passport plus proof of address.
That’s not a red flag. New Zealand’s anti-money-laundering rules require it of any registered financial service provider, and a platform that doesn’t ask is the one worth being suspicious of.
Allow a day or two for verification. It’s rarely instant.
Fees you’ll actually pay
Four of them, and they’re not always presented together:
- Spread the gap between the buy and sell price, often the largest cost
- Trading fee a percentage of the transaction
- Deposit fee often zero for NZD bank transfers
- Withdrawal fee charged when you send bitcoin out
That fourth one shapes how you move funds later. It’s usually a flat fee, which means one larger transfer costs less than several small ones. Worth knowing before you plan.
Start small
Your first purchase is partly a test of the process. Buy an amount you’d be entirely relaxed about, and confirm the whole path works deposit, purchase, and a small withdrawal to a wallet you control.
Once you’ve done it once, doing it with a larger amount is just repetition. Doing it for the first time with your savings is unnecessarily stressful.
Before you move anything: start your records
Almost nobody is told this at the point of purchase, and reconstructing it years later is genuinely miserable.
Record from your very first buy:
- Date and time
- Amount of bitcoin
- NZD value at the time
- Fees paid
- Platform used
- Transaction IDs
Moving crypto between wallets you control generally isn’t a taxable disposal you haven’t sold anything. Selling is, and Inland Revenue expects you to be able to show your cost base when you do.
A spreadsheet started on day one takes two minutes per transaction. Rebuilding it from bank statements three years later takes a weekend.
Do you need a cold wallet yet?
Honestly, maybe not and that’s worth saying on a page that sells them.
For a small first purchase you’re actively learning with, a reputable exchange with app-based two-factor authentication is a reasonable place to start.
Three tests
The sleep test. Would losing this amount ruin your month? Your year? If yes, it belongs in self-custody.
The time test. Are you trading this in the next three months? If not, it has no functional reason to sit on an exchange.
The proportion test. What share of your savings is it? A month’s pay behaves very differently from a year’s.
Fail any of those and it’s time. Our guide to wallet versus exchange storage covers where that threshold sits in more detail.
What changes when you cross the line
An exchange balance is a claim against a company. That’s a perfectly reasonable arrangement for a small amount you’re actively trading, and an increasingly poor one for a holding you’re keeping for years.
Counterparty risk stops being theoretical when the number matters.
Part two setting up the wallet properly
Do this before any funds are involved. The entire point is being certain it works while a mistake is still free.
Choosing a set size
Hardware wallets come as sets two or three devices holding the same key. Three is worth the small extra cost, because it means losing one leaves you still properly backed up rather than running on a single device.
Our comparison of the 2-card and 3-card sets covers why, including the point that you can’t add a card later.
Set an access code you’ll actually remember
Not something clever. Something you’ll recall in five years, under stress, without a prompt.
And don’t store it on the phone you tap the card with that puts both halves of your security in one pocket.
Verify every device before funding
The step everyone skips, and the one that matters most.
Close the app. Open the wallet using the second card. Close it again. Open it with the third. Confirm each one independently gives you access.
An untested backup isn’t a backup. Finding out at this stage costs you nothing; finding out later costs you everything.
Decide where the backups live
Before funds arrive, not afterwards. Separate buildings at minimum, and ideally one somewhere genuinely unrelated a different city, or a professional’s custody.
Three cards in one drawer is one fire, flood or burglary away from zero.
Part three moving it across
Short, because the sequence matters more than the detail.
- Open your wallet app and copy the receiving address from there
- Send a small test amount first the minimum the platform allows
- Confirm it arrives in your wallet app, not just on a block explorer
- Send the rest, in as few transfers as withdrawal fees make sensible
Why the test transaction is worth the fee
It costs you one extra withdrawal fee. It protects against an irreversible mistake with your entire holding.
That’s the cheapest insurance available in crypto, and skipping it to save a few dollars is the worst trade on this page.
The address rules
- Copy from your wallet app, never from transaction history
- Check the first and last six characters after pasting
- Never type an address manually
Address poisoning works by seeding a lookalike address into your history so you copy the wrong one later. Our guide to transferring crypto from an exchange walks through the full process safely.
The three stages at a glance
| Stage | Where it lives | Who controls it | Main risk | What protects you |
|---|---|---|---|---|
| On the exchange | The company’s wallets | The exchange | Insolvency, freezes, hacks | Their security, app-based 2FA |
| In transit | The blockchain | Nobody | Wrong address irreversible | Test transaction, address checks |
| In your wallet | Your card’s chip | You | Losing all backups | Separate storage, tested devices |
What can go wrong, and how to avoid it
| Risk | Prevention |
|---|---|
| Sending to a wrong address | Test transaction, copy from the app only |
| Being phished for a recovery phrase | Never enter one anywhere, for any reason |
| Losing every backup device | Store separately, buy the 3-card set |
| Forgetting your access code | Choose something memorable, not clever |
| Fake “support” after you post about it | Never discuss your holdings publicly |
That last one is underrated. People announce a first bitcoin purchase online and are contacted within hours by someone offering help. Our guide to protecting your crypto from scams covers how that works.
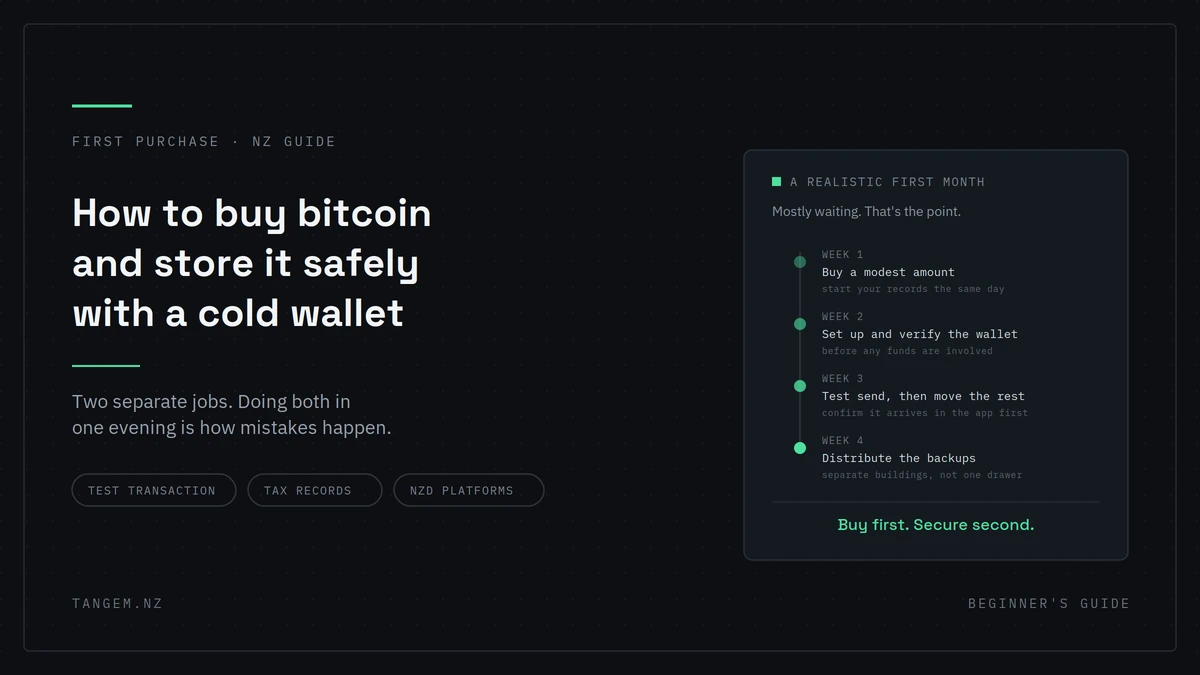
A realistic first month
The sequence that keeps this calm rather than stressful.
Week one. Verify your identity on a platform, deposit NZD, buy a modest amount. Start your records spreadsheet the same day.
Week two. Order the wallet. When it arrives, set it up and verify every card opens it with no funds involved.
Week three. Send a small test transaction. Confirm it arrives. Then move the rest.
Week four. Distribute your backup cards to their planned locations. Update your records. Set a calendar reminder to review it all in six months.
Four weeks, and most of it is waiting. Nothing here needs to happen in one sitting, and the outcome is much better when it doesn’t.
FAQs
Where can I buy bitcoin in New Zealand?
Several platforms operate here with NZD deposits, including NZ-registered businesses and offshore exchanges. Compare NZD support, fees, where the company is incorporated, and how straightforward withdrawals are that last one matters if you plan to self-custody.
Do I need a hardware wallet for a small amount?
Not necessarily. For a small holding you’re actively trading, a reputable exchange with app-based 2FA is reasonable. The case strengthens as the amount grows and as your holding period lengthens.
How long does it take to move bitcoin to a cold wallet?
The transaction itself usually confirms within an hour, often faster. The wider process setup, verification, test transaction is better spread across a couple of weeks than compressed into an evening.
What if I send it to the wrong address?
It’s irreversible. Nobody can recall a confirmed transaction. This is precisely why a small test transaction first is worth the extra withdrawal fee.
Do I have to pay tax on bitcoin in New Zealand?
Selling can be a taxable event and Inland Revenue expects you to show your cost base. Moving between your own wallets generally isn’t a disposal. Keep records from your first purchase and check IRD’s current guidance.
Can I buy bitcoin directly to a hardware wallet?
Some platforms let you withdraw straight to an address you provide, so effectively yes you buy on the platform and withdraw to your wallet. You’d still do a small test transaction first.
What’s the safest way to store bitcoin long term?
A hardware wallet with multiple backup devices stored in separate locations, an access code you’ll remember, and a plan for what happens if something happens to you. The storage arrangement matters more than which device you choose.